
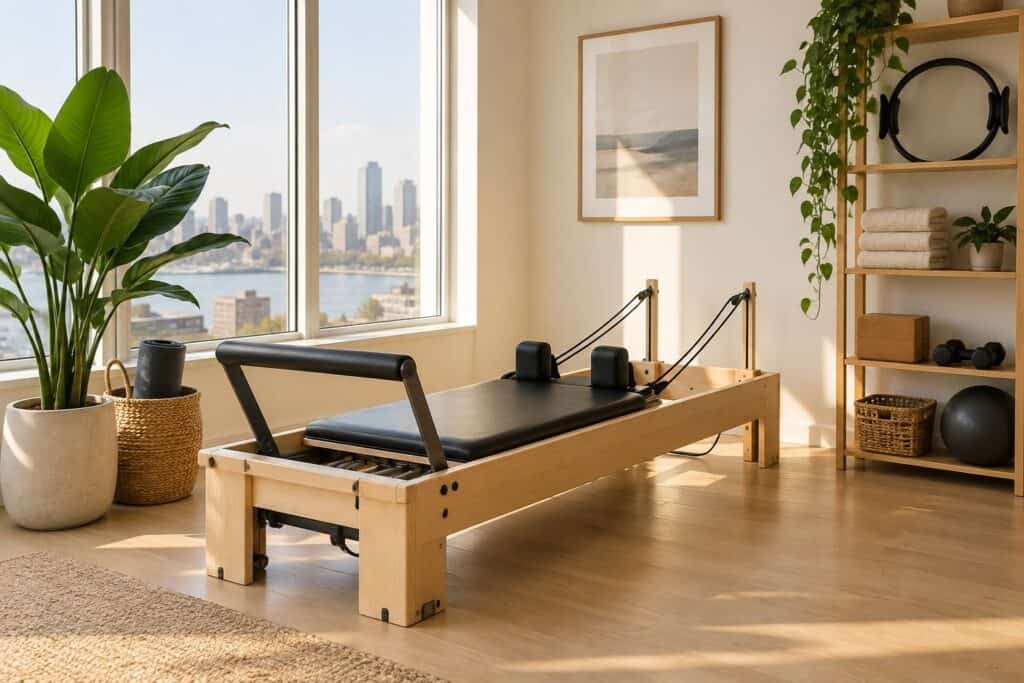
You do not need a spare room to practise consistently. A workable home Pilates studio setup fits into a corner of a bedroom, a section of a basement, or a narrow strip of living room floor — as long as you plan the footprint, the flooring and the storage before you buy the equipment.
This guide covers the real space requirements for reformer and mat work, what to put underfoot, the order to buy equipment in when the budget is finite, foldable and storage-friendly options, and how to get the lighting and sound right so you actually use the space.
Minimum footprint and clearances
Start by measuring, not by shopping. The two numbers that matter are the equipment footprint and the movement envelope around it.
Reformer dimensions
A typical home reformer is roughly 8 feet long and 24–27 inches wide, with studio models running longer. Always check the manufacturer’s stated length including the footbar and any extension — that figure, not the frame length, is what has to fit.
Clearance around the machine
Plan for usable space on the sides and ends:
- Sides: about 2 feet on at least one side so you can mount and dismount safely and let arms travel in side-lying work. Two feet on both sides is ideal.
- Foot end: 1–2 feet, more if you plan to use a jumpboard or a tower attachment.
- Head end: 1–2 feet for straps, long-box work and reaching overhead.
- Ceiling height: 8 feet is comfortable for most standing and kneeling work on the carriage. If you have low ceilings, measure your own height kneeling on the carriage with arms overhead before committing.
In practice, a realistic total working area for a reformer is about 11 to 12 feet by 7 feet. If that is not available, a partial overlap works: the reformer can sit against a wall and be pulled out 2 feet for a session, provided the floor is clear and the machine moves easily.
Mat-only footprint
For mat Pilates you need roughly 7 feet by 4 feet of clear floor plus room to extend arms and legs without hitting furniture. A 6 x 4 foot area is the practical minimum. Test it by lying down and sweeping your arms and legs through a full circle before you commit to the spot.
Flooring and mirrors
What to put under the equipment
Reformers are heavy and concentrate load on four feet. On hardwood or laminate, use equipment mats or felt pads under each foot to prevent denting and to reduce the noise transmitted to rooms below. On carpet, a firm low-pile is fine, but a plywood or rubber base gives a more stable, level platform and makes the machine easier to slide out.
For mat work, a dedicated 8–10mm exercise mat provides enough cushioning for spinal articulation without the instability of a thick foam mat. Interlocking rubber tiles across the whole zone are worth it if the space is permanent — they protect the subfloor, deaden sound, and give consistent grip.
Mirrors: useful, not essential
One mirror positioned to the side of the reformer, roughly at carriage level and tall enough to show you from head to hip, is more useful than a full mirrored wall. You want to check alignment in profile — shoulder stacking, pelvic position, knee tracking — which a front-facing mirror will not show. Frameless acrylic mirror panels are a light, low-cost option for rented spaces; mount them where you will not be exercising directly underneath.
Equipment priority order on a budget
Buy in the order that maximizes the number of exercises you can do well, not the order that looks best.
- A quality mat. Everything starts here, and a good mat is usable forever.
- A resistance ring (magic circle) and a small stability ball. Inexpensive, tiny to store, and they open up dozens of exercises.
- Resistance bands and a light hand-weight set. Adds progressive load to arm and hip work.
- A foam roller. Doubles as a balance challenge and a recovery tool.
- The reformer. The biggest cost and the biggest jump in capability. Buy it once you know you will use it — and buy at the quality level you will not outgrow in a year.
- Reformer add-ons. Jumpboard, long box, tower or half-trunk, extra springs. Add these as your practice demands them.
- Chair or barrel. Excellent equipment, but a luxury in a small space.
For the smaller items in steps 1–4, our roundup of the best Pilates accessories for a home reformer setup covers what earns its shelf space. If you are still weighing machine options, the home reformer buying guide walks through frame materials, spring systems and carriage quality.
Storage and foldable options
The reason most home studios stop getting used is that setting up takes more than a minute. Design the pack-down before you design the workout.
Folding and vertical-storage reformers
Several home models fold in half or stand on end, reducing an 8-foot footprint to a 3–4 foot parked position. Two things to verify before buying: how heavy the machine is to lift into the stored position on your own, and whether folding requires removing anything. A folding reformer you need help with is a reformer that stays unfolded.
Wheels matter more than folding
For many small spaces, a reformer with good transport wheels that slides against the wall is more practical than a folding model. Check whether the wheels are on the frame end or need a lifting handle, and whether they will roll over your flooring.
Storing the small kit
A single narrow shelving unit or a wall-mounted rail with hooks keeps rings, bands, rollers and blocks visible and off the floor. A lidded basket works too, but anything you have to dig through tends to go unused. Keep springs, straps and any loose hardware in one labelled container so nothing migrates.
Multi-use rooms
If the studio shares a room with a bed or a desk, define it visually: a rug that marks the practice zone, a folding screen, or simply keeping that floor area permanently clear. A visual boundary does a surprising amount of work for consistency.
Lighting and sound
The last 10% of the setup is what makes a space you want to enter.
Lighting
Avoid a single overhead fixture directly above where you lie down — you will spend supine exercises staring into it. Use two or three lower, warmer sources placed to the sides, ideally dimmable. Daylight is the best option where you have it; position the mat so a window is to your side rather than in your eyeline. For evening sessions, warmer colour temperatures around 2700–3000K read as calmer than cool white.
Sound
A small Bluetooth speaker placed at head height near the head end of the reformer beats a phone speaker on the floor — you need to hear cues over your own breathing without turning the volume up. In apartments and basements, a rug, curtains and a few soft furnishings noticeably reduce echo and the amount of spring noise travelling to other rooms. Equipment mats under the reformer feet do the rest.
Screen placement
If you follow classes online, mount or prop the screen so it is visible from lying, seated and standing positions — usually that means at roughly seated eye height, a metre or two from the head end, angled slightly down. Test it in all three positions before you fix anything to a wall.
Frequently asked questions
How much space do I really need for a reformer at home?
A working area of about 11–12 feet by 7 feet is comfortable. You can manage with less if the machine can be pulled away from a wall for sessions and pushed back afterwards.
Can I use a reformer in a room with 7-foot ceilings?
Most mat-level and seated work is fine. Standing and kneeling work on the carriage may not be. Measure your reach while kneeling on a surface about 14 inches off the floor — that is roughly carriage height — and check against your ceiling.
Is a folding reformer as good as a fixed one?
Modern folding models are stable and well built, but a fixed frame at the same price point will usually feel more solid and offer a longer carriage travel. Choose folding if storage is the limiting factor, fixed if space allows.
Can I set up a studio in a basement?
Yes, with attention to ceiling height, floor levelness and humidity. Check headroom under ducts and beams, use a moisture barrier or rubber tiles on concrete, and keep a dehumidifier running if the space is damp — springs and upholstery both suffer in persistent humidity.
How do I keep the equipment in good condition?
Wipe upholstery after each session, keep springs dry and inspect them regularly, and check bolts and straps periodically. Our reformer maintenance guide sets out a simple routine.
Build the space you will actually use
The best home studio is not the biggest one — it is the one where the mat is already down, the reformer rolls out in twenty seconds, and the lighting does not make you squint. Measure first, buy in priority order, and solve storage before you solve aesthetics.
Ready to choose your equipment? Browse our reformers and accessories, or get in touch with your room dimensions and we will tell you honestly what will fit.